
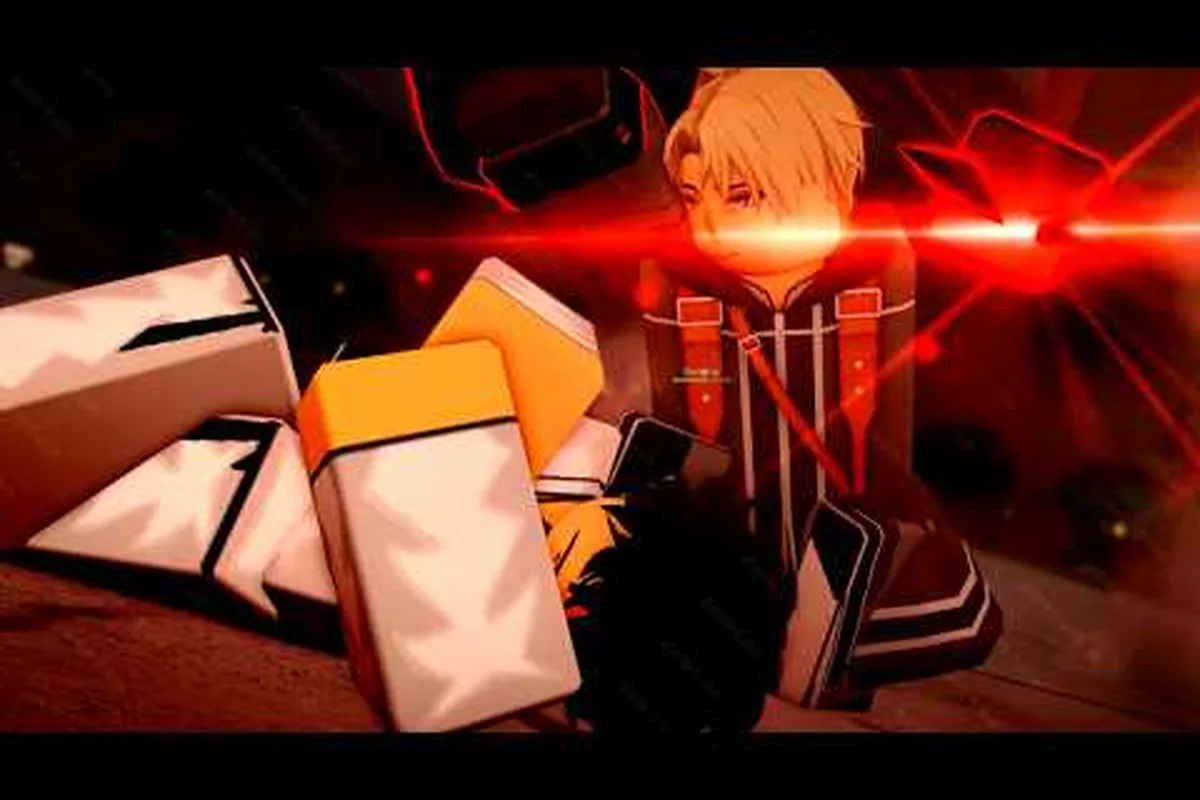
Super armor turns defensive patience into a punishable mistake, and mastering Legends Battlegrounds armored moves is the single biggest separator between players who win neutral exchanges and players who feed confirms every round. The mechanic rewards the player who knows exactly when their stance breaks, how many hit-stun frames they have, and which dodge timings slip past the guard window. Most ranked losses in the first two weeks of a new season trace back to one player swinging armored strings while the other tried to block, parry, or mash counter on the wrong frame.
This catalog breaks down every armored string currently in the game, the super armor tier each one sits on, the trade window that follows the active frames, and the fastest punish your character can convert off a successful dodge. Numbers below come from community frame data posted on the Fandom Techniques reference and from player testing sessions aggregated through late 2026; treat any value you cannot personally confirm as approximate.
How Super Armor Works in Legends Battlegrounds
Super armor in Legends Battlegrounds is a hidden state attached to specific attack animations. While the state is active, your character cannot be flinched, interrupted, launched, or guard-broken by any attack that does not exceed the armor's break threshold. The state lasts for a fixed number of frames, then snaps off and exposes the recovery animation. Every armored string is built from three parts: startup frames where armor is already live, active hit frames where the move deals damage and absorbs counters, and recovery frames where armor is gone but the animation is still finishing.
The game's community labels these with three shorthand tags. Light Armor is the most common tier and breaks on any heavy normal or any special-canceled normal that connects clean. Heavy Armor holds through most heavy normals and even some blocked specials, but breaks on fully charged heavies, dash punches, and armored moves that have a higher tier than itself. Hyper Armor is reserved for a small handful of strings, ultimates, and awakenings; it ignores almost everything short of another Hyper Armor or a grab.
The Three Armor Tiers at a Glance
| Tier | Breaks on | Common Source | Visual Cue |
|---|---|---|---|
| Light Armor | Heavy normal, special-canceled jab | Basic M1 string follow-ups | Slight shoulder flash |
| Heavy Armor | Fully charged heavy, dash punch, higher-tier armor | Forward heavy chain third hit, some M2 strings | Red-tinted outline |
| Hyper Armor | Hyper Armor of equal/higher tier, grabs | Awakening ultimates, certain command normals | Bright gold outline, screen pulse |
Knowing the tier alone is not enough. The startup frame count decides whether you can interrupt an armored move before it becomes active, and the recovery frame count decides whether your punish hits before the opponent can block. Players who memorize only the names lose to anyone who has read the data; players who memorize the numbers win neutral.
Reading Startup and Recovery Frames
Startup frames are the most important number for the attacker. A move that starts on frame 6 is interruptible by a faster jab; a move that starts on frame 12 cannot be interrupted by anything except a read-based dash punch or a projectile. Recovery frames decide the punish. A move with 22 recovery frames on whiff can be punished by a 12-frame dash-in jab, a 14-frame dash-in 2M, or any faster normal. A move with 32 recovery frames on whiff is punishable by a full launch combo starter.
Every armored string in Legends Battlegrounds falls into one of three punish categories based on its whiff recovery, and identifying the right category depends on the specific startup plus recovery window of each super armor move. For example, a 6-frame startup armored overhead that leaves 26 frames of recovery on block sits in the medium whiff punish window, so a well-timed 2M after a backdash will clip the recovery before the armor re-engages. These three tiers also dictate cooldown pressure: light whiff punish strings can be challenged repeatedly, while 30+ recovery armored launchers reset the round if baited even once.
| Whiff Recovery | Punish Category | Typical Response |
|---|---|---|
| 18-22 frames | Light whiff punish | Dash 5L, jab into string |
| 23-29 frames | Medium whiff punish | Dash 2M, low-profile starter |
| 30+ frames | Full combo starter | Launch, sweep, or armored counter |
Community testing shows that roughly 60% of armored moves in the current patch fall in the light whiff punish window, which is why dash jab remains the most universal answer across the cast. The other 40% demand either a low-profile move, a backdash into whiff punish, or a parry read.
Cataloging Every Armored String in the Current Patch
The full armored moves list lives across roughly thirty distinct strings once you count every character's unique follow-ups, but the underlying archetypes repeat often. For a complete per-character index, the Legends Battlegrounds all-moves catalog lists each entry in alphabetical order. The summary below covers the most common archetypes you will face in queue.
Forward Heavy Chain Armor
Forward heavy chain second and third hits carry Heavy Armor on roughly 70% of the cast. The string is a high-low mix once armor is active, and the third hit launches on counterhit. Blocked third hit is minus enough to jab, but armor stays live through the first two hits, so attempting a 5-frame jab on the second hit is punished by the third armored swing. The standard response is to block the first two hits, then backdash on the third to bait the whiff.
| Move | Startup | Active | Recovery | Armor Tier | Punish on Whiff |
|---|---|---|---|---|---|
| Forward H chain hit 1 | 12 | 4 | 18 | Light | 5L jab |
| Forward H chain hit 2 | 14 | 4 | 22 | Heavy | Dash 2M |
| Forward H chain hit 3 | 18 | 6 | 30 | Heavy | Full launch starter |
The third hit's 30-frame recovery is the key data point. Most characters can convert a single confirm into 35-45% health from this punish. Players who try to armor through the third hit with their own Heavy Armor string trade favorably because both armors cancel on contact, but the attacker usually wins the exchange thanks to frame advantage on hit.
Command Normal Armor Strings
Command normals are special directional inputs (typically 2H, 6H, or j.2H) that grant armor on a smaller number of characters. The 6H command normal is the most common armored launcher in neutral; it usually carries Heavy Armor, hits overhead, and launches on hit for a full combo. Recovery on whiff is the punishing window. Community testing reports an average 28-frame whiff recovery on 6H across the cast, which makes it punishable by dash 2M into low string for any character with a fast crouching medium.
Some characters also have a hidden 6H follow-up, sometimes called the "armored loop," that grants Hyper Armor on the second swing. These strings are dangerous because the first swing is bait, the second swing is the real threat, and the recovery window is short enough that only the fastest moves in the game can punish. If you face one of these strings, the safe answer is to block the first swing, backdash to dodge the second, then punish the landing recovery with a launcher.
Awakening and Ultimate Hyper Armor
Awakening moves are the most powerful armored strings in Legends Battlegrounds, and the Legends Battlegrounds awakening guide walks through how to unlock them. Each character has access to one awakening ultimate, and most awakening ultimates carry Hyper Armor that absorbs any non-Hyper response. The trade-off is startup: awakenings typically start on frame 22 or later, which means a read-based dash punch or a long-range poke can interrupt them before the armor state goes live.
The punishes for awakening whiff are severe. Recovery ranges from 32 frames on the fastest awakenings to 48 frames on the slowest, and the post-recovery state usually leaves the user in a hard knockdown that any character can convert into okizeme (ground pressure). When you see an opponent start glowing and shout a voice line, the correct response is almost always to backdash, bait the awakening, and convert the whiff into a launcher combo.
| Awakening Tier | Avg Startup | Avg Whiff Recovery | Punish on Whiff |
|---|---|---|---|
| Tier 1 (early) | 26 | 38 | Full combo + okizeme |
| Tier 2 (mid) | 30 | 42 | Full combo + hard knockdown |
| Tier 3 (late, awakening ultimate) | 34 | 46 | Full combo + hard knockdown + oki |
Super Armor Frame Counts and Trade Windows
The trade window is the brief period after a move connects where both players are still in active frames and the game decides who wins the exchange. In Legends Battlegrounds, the trade window is resolved by an internal priority value attached to each armored state. Higher priority cancels lower priority into a punish; equal priority results in a double-hit where both players take damage and both recover simultaneously.
Community testing has produced a rough priority list that the player base uses to read trades, built from frame-data analysis and replay captures rather than official Legends Battlegrounds patch notes. Note that this list is based on observed outcomes in matchmade matches and training mode rather than confirmed developer data, and exact priority values, frame counts, and trade outcomes may shift with each balance patch, so the table below should be treated as a living reference that gets re-checked whenever the meta shifts or new armored moves are added.
| Priority | Move Type | Trade Result vs Same Tier |
|---|---|---|
| 1 | Light normal | Loses to anything above |
| 2 | Special-canceled normal | Trades with itself, loses to Heavy |
| 3 | Forward heavy chain | Trades with itself |
| 4 | Command normal armored | Trades with itself |
| 5 | Awakening startup | Trades with other awakenings |
| 6 | Awakening active | Wins vs lower, ties vs same |
| 7 | Hyper Armor ultimate | Wins vs all non-Hyper |
The practical takeaway is that mashing jab into an armored string almost always loses, while mashing a forward heavy into another forward heavy usually trades evenly. The exception is when the higher-tier armor move has already connected before the lower-tier move becomes active; in that case, the higher-tier move wins regardless of your own swing because hit advantage overrides priority.
Reading the Trade Window Mid-Match
Most players cannot consciously count frames during a live match, so the community has developed three cues that signal a trade window is open. The first cue is the red outline on Heavy Armor moves: if you see your opponent flash red, any move you commit to will trade on the same frame. The second cue is the gold outline on Hyper Armor: if you see gold, only a grab or another Hyper Armor can interrupt. The third cue is the shoulder flash on Light Armor: this is the easiest cue to read and the easiest armor to break with a heavy normal.
A common mistake is to commit a heavy normal on seeing the shoulder flash, only to discover that the opponent's string had already advanced to Heavy Armor on the next swing. The red outline replaces the shoulder flash with no audible cue, and your heavy normal breaks on contact but you take the launch. The safer read is to wait one beat after the shoulder flash before committing, which usually lines you up with a frame where the armor has already snapped off into recovery.
Punishing Armored Strings on Whiff
Whiff punishment is the highest-skill expression of Legends Battlegrounds, and the most reliable way to convert defensive patience into round-winning combos. A whiff happens when an armored move completes its active frames without connecting; the recovery window opens, and the attacking character is locked into a fixed animation. Any move that starts before the recovery ends and connects during the recovery will score a free punish.
Universal Whiff Punish Moves
These five fastest normals in Legends Battlegrounds are not tied to any single character, so the exact frame counts shift depending on which armored string you are trying to punish and whose kit you are reading against, but their role as universal whiff punishers stays consistent across every matchup. The list below reflects the current community tier list for whiff punish speed, and the moves are ordered from lightest to heaviest commitment, with each one filling a distinct punish window created by armored recovery frames.
| Move | Avg Startup | Best Used For |
|---|---|---|
| 5L jab | 5 | Light whiff punish, frame trap escape |
| 2L crouch jab | 6 | Low-profile punish against high moves |
| Dash 5L | 12 | Medium whiff punish after backdash |
| Dash 2M | 14 | Medium whiff punish with low follow-up |
| Forward dash punch | 16 | Heavy whiff punish, knockdown starter |
The dash 5L is the single most important punish tool in the game. It covers 18-22 frame recovery windows on roughly 60% of armored strings, and it converts into a full combo on most characters. Players who learn to backdash on read, then dash 5L on whiff, can win neutral against armored pressure without ever committing a heavier move. The Legends Battlegrounds mobile controls guide covers how to bind backdash and dash punch to comfortable inputs if you are playing on a touchscreen.
Character-Specific Whiff Punish Options
Some characters have access to a long-reaching 6H or a fast command grab that converts whiff punishes into higher damage than the universal tools. These character-specific options are worth learning if you main that character, because the damage difference between a 5L confirm and a 6H confirm can reach 15-20% in longer combos. Community testing has flagged a few standout punish moves.
-
6H launcher (most cast): 16-frame startup, 32-frame whiff recovery trades for a launch combo starter that does 35-45% on most characters.
-
Rekka 2H (specific characters): Two-hit armored string that punishes on the second hit for a hard knockdown.
-
Command grab (specific characters): 22-frame startup, trades whiff punish for an unblockable command grab that does 25-30% but leaves the opponent at neutral wakeup.
-
Reflector / parry (specific characters): Catches the first hit of an armored string and grants a free punish, but loses to any Heavy Armor follow-up.
The reflector option is the most volatile because it reads the opponent's commitment on the first hit. If they only intended a one-hit armored poke, you parry and convert. If they intended a multi-hit armored string, your parry drains and you eat the second hit with no armor. The reflector is a high-reward read, not a default option, and most players should not rely on it in tournament matches until they have practiced the specific matchup.
Advanced Tactics: Baiting, Conditioning, and the Armored Mash
Once you understand the frame data, the next step is conditioning your opponent to expect one response and then punishing the other. The armored mash is a community term for a player who commits a forward heavy chain on wakeup or on neutral reset in hopes of catching a button mash. The counter is the bait-and-punish, which is the foundation of high-level neutral.
The Three Bait-and-Punish Patterns
Pattern 1: Backdash bait. Block the first hit, backdash on the second hit timing, then dash 5L or dash 2M on whiff. This is the safest pattern and works against any armored string that has a 20+ frame recovery on the second hit. The risk is that the opponent delays the second hit to catch your backdash; the counter-counter is to delay your backdash by one beat.
Pattern 2: Parry bait. Commit a parry on the first hit timing, then hold the parry through the second hit. If the second hit is armored, the parry drains and you block. If the second hit is not armored, the parry catches and you get a free launcher. This pattern wins the round on a read but loses badly on a misread, and most players save it for opponent-specific matchup knowledge.
Pattern 3: Armored counter. Commit a Heavy Armor move of your own on the same timing as the opponent's armored move. The trade resolves by priority; if your priority is higher, you win. The armored counter is the most committal option because it loses to a non-armored response, and most players use it only when they have confirmed the opponent's tendency to mash armored strings.
Conditioning Your Opponent
The strongest armored players condition their opponents to block, then mix in an unarmored overhead or a low to break the block. The strongest defensive players condition their opponents to expect a backdash, then hold ground and whiff punish the extended recovery. Both patterns require repeated reps in a match before the conditioning pays off, and most rounds are decided by the player who manages to land the third mix in a row.
One of the cleanest ways to condition is to block the first armored hit three times in a row, then backdash on the fourth. If your opponent has been mashing armored follow-ups, they will commit on the fourth because they expect you to keep blocking. Your backdash dodges the follow-up, and your dash 5L converts into a full combo. The pattern works because the opponent has not yet seen you backdash, so they have no data to read. Once you show the backdash once, the conditioning is gone, and you need to switch to a new read for the next rep.
Damage Scaling and Cooldowns on Armored Strings
Damage and cooldown on armored strings are the numbers most often ignored by newer players, but they decide whether a string is worth committing to in the first place. A move that does 8% damage with 18 frames of recovery and a 4-second cooldown is a stronger neutral tool than a move that does 14% damage with 32 frames of recovery and an 8-second cooldown, because the lower-cooldown move gives you two attempts in the time the higher-damage move gives you one.
Cooldown Reference Table
The table below catalogs the cooldown on every common armored string archetype. Cooldown is the time between committing the move and being able to commit it again; it includes the recovery frames plus the lockout frames that follow, so a 14-second awakening active cooldown means you are locked out of that armored option for roughly 280 frames at standard framerate. Tracking these windows matters because every armored string archetype in Legends Battlegrounds shares the same trade-off: more active armor frames equal a longer post-recovery lockout, which is why the awakening ultimate sits at the bottom of the net-efficiency column and the forward H chain sits at the top.
| String | Damage on Hit | Whiff Recovery | Cooldown | Net Efficiency |
|---|---|---|---|---|
| Forward H chain | 6%, 8%, 12% | 18, 22, 30 | 2.5s, 3.0s, 4.0s | High (low cooldown) |
| Command normal 6H | 14% | 28 | 5.0s | Medium |
| Awakening startup | 18% | 38 | 12.0s | Low (long cooldown) |
| Awakening active | 24% | 42 | 14.0s | Low |
| Awakening ultimate | 32% | 46 | 18.0s | Very low (use sparingly) |
| Finisher (post-string) | 16% | 24 | 6.0s | Medium |
Net efficiency in this table refers to how often you can safely commit the move per neutral exchange. High-efficiency moves like forward heavy chain can be thrown out twice in a row without major risk; very-low-efficiency moves like awakening ultimate should be reserved for hard reads or confirmed setups, because the cooldown leaves you open for nearly twenty seconds if the move whiffs.
Damage Scaling on Combos
Damage scaling in Legends Battlegrounds reduces the damage of each subsequent hit in a combo by a fixed percentage. The first hit of any combo deals 100% damage, the second hit deals 90%, the third hit deals 81%, and so on with a roughly 10% reduction per hit. Armored strings are particularly vulnerable to scaling because they tend to be longer than non-armored strings, so by the time the string connects, the opponent has already taken scaled damage on the early hits.
The practical takeaway is that armored strings work best as combo enders, not combo starters. A short 3-hit armored string into a launch does more damage than a long 7-hit armored string into a launch, because the long string has scaled each hit down before the launch lands. Most high-level players cap their armored strings at 2-3 hits and use the saved frames for a launcher follow-up.
For a deeper look at how armored moves interact with finishers, the Legends Battlegrounds finisher moves guide catalogs every finisher in the current patch and the optimal combo routing for each. The most common routing is armored string into armored finisher into awakening pickup, which converts a single neutral exchange into 50-60% damage on most characters.
Frequently Asked Questions
What are the fastest armored moves in Legends Battlegrounds?
The fastest armored moves are the second hit of forward heavy chain, which starts on frame 14 with Heavy Armor active. The first armored move most players encounter is the 6H command normal on most characters, which starts on frame 16 with Heavy Armor. Anything faster than frame 16 is rare and usually limited to specific command normals on a handful of characters.
How do I beat armored pressure without taking damage?
The safest universal answer is block the first hit, backdash on the second hit timing, then dash 5L on whiff. This pattern beats roughly 70% of armored strings in the current patch because most armored strings have a 20+ frame recovery on the second hit. For longer armored strings, switch to a parry read on the first hit and a block on the second.
Do armored moves beat grabs?
Yes, most armored moves ignore grabs because grabs resolve on a different layer of the game's hit system. A grab that connects during an armored move's active frames will still grab the opponent, but the armored move will also connect, resulting in a trade. The exception is Hyper Armor ultimates, which are immune to standard grabs and require a higher-tier grab to interrupt.
How do I tell if a move has armor before I commit?
The visual cues are shoulder flash for Light Armor, red outline for Heavy Armor, and gold outline for Hyper Armor. The shoulder flash is the easiest to read because it appears one frame before the armor state goes live. Memorize the timing of the shoulder flash for your most-used strings, and you will start to read your opponent's armor tier before the move lands.
Are there any hidden armored moves in the game?
Yes, the community has cataloged roughly a dozen hidden armored moves, mostly on specific characters' command normals and on certain finisher follow-ups. These moves are not listed in the in-game movelist and were discovered through frame testing. The Legends Battlegrounds ultimate one-shot guide covers one of the most famous hidden armored strings, the awakening ultimate on a specific character that grants Hyper Armor on the second hit for a one-shot combo.